Getting Started with Smart Contracts Using Solidity: A Helpful Intro

This article aims to introduce Solidity language as a tool to write smart contracts and for the ease of the audience, it begins with Remix IDE to write the Solidity scripts. In this article, we are going to see how data types are defined in Solidity and learn how to work with Remix IDE. In addition to that, we are going to write smart contracts using Solidity to store and retrieve data.
Why Using Solidity?
One of the most famous languages used to deploy smart contracts on the Ethereum blockchain is Solidity. Once you learn how to code with this language, not only will you be able to write smart contracts, but you are open to many projects and tasks such as ICOs, NFT, metaverse, and so on. So learning how to write smart contracts using Solidity is the key to opening many doors to the hot topics of the world of blockchain and cryptocurrency.
Solidity is a high-level language that is influenced by C++, Python, and Javascript. It is object-oriented, supports inheritance, and is mostly designed to govern smart contracts and EVM (Ethereum Virtual Machine).

Smart Contracts Using Solidity: Learning the Basics
Before getting started, you need to have a basic understanding of different concepts in blockchain, smart contracts, and the Ethereum network. In this tutorial, we have provided the definitions of some of the useful terms and a number of main concepts about the Ethereum network that we are going to work with throughout the course. But don’t worry, most of these terms and concepts are explained in between the practical codes so that you can have a deeper understanding of smart contracts using Solidity.
Getting started with Remix IDE
We begin our first simple smart contract with a storage example. Before we go after the scripts, we should determine what text editor we are going to use. For beginners, we recommend using remix IDE. For further uses where we want to run more advanced projects that need to be run next to python or node.js, you can use sublime text or other text editors but keep in mind that if you want to run Solidity script outside remix, you will need to install it on your terminal or command prompt. The files are also saved in the .sol format. So, with that being said let’s code our very first Solidity smart contract in remix:
Once you head over to remix IDE on your browser, you will see different featured plugins, one of which is Solidity. Click on it.

On the navbar of the left-hand side, you will see some icons. Click on the Ethereum icon, and you will see that you are given an Ethereum account on a test network to deploy and test your smart contracts. Besides, it has a certain balance to support the gas fees of every transaction.

Now, switch to file explorer where you can manage your script files. Click on the contracts folder and create a new file, then save the name of the file as FirstContract.sol.

If you select the Solidity icon on the navbar, you will be able to see the version of the compiler which shows different versions of Solidity. Notice that the Solidity version number is in the format of 0.x.y. So, as mentioned in the Solidity documentation, if the code version of Solidity is 0.x.y, it should be complied with 0.x.z where z>y. In other words, the version of the Solidity compiler should be greater than the version of the code. (In the code, you will see that we use pragma Solidity 0.x.y, that is the of Solidity).

The First Solidity Script
Now that we are familiar with the remix IDE, Let’s write our first script:
pragma Solidity >= 0.4.16 < 0.9.0;
contract SimpleStorage {
uint storedData;
function save(uint _storedData) public {
storedData = _storedData;
}
function retrieve() public view returns (uint) {
return storedData;
}
}
As you can see, we have specified the version of Solidity to be somewhere between 0.4.16 and 0.9.0 not to face any further issues. Of course, if you install Solidity on your operating system, you will need to specify it according to the version you have installed. Now, it’s time to define our contract, SimpleStorage, and then define our variable storedData. In Solidity we have 2 specifiers for variables, one that defines the data type (like uint, uint 256, uint8, bool, string, address, byte, string, and so on) and the other that specifies the visibility of the variable.
Visibility of the Variables
There are 4 types of specifiers dealing with the visibility of the variables:
1. internal:
Every function or variable if not specified, will be defined as internal by default. When it is specified this way, it will only be visible inside the function and nowhere else, unless it is retrieved by a view or pure function, which we will talk about later.
2. external:
It can be used outside the function.
3. private:
It's the same as internal but with the more restricted privacy of visibility.
4. public:
It can be fetched anywhere and works as a global variable or function.
In the above code, because we haven’t specified the visibility of the storedData variable, it is by default internal. Notice that we have also specified the visibility of the functions inside the smart contract. Finally, we have defined a function named retrieve and because we have written view before returns, it can gain access to any internal variable outside the function and return it. Without a view, we won’t be able to gain access to storedData variable unless it was declared as public.
If we compile this code, in the Deploy and run (Ethereum icon) section and click deploy, in the deployed contracts part, we will be able to see 2 buttons, save and retrieve. Which is representative of the 2 functions we have defined.
After deploying the contract you will see that a small proportion of your balance has been subtracted from the cost of the transaction.

If you enter a number in the blank form next to save and press it and then press retrieve, you will be able to see the number you had entered, appears under the retrieve button.

Congratulations! You have successfully deployed your first smart contract. In the next sections of our tutorials, we are going to write more complex smart contracts and get closer to the real world Decentralized applications.
Smart Contracts Using Solidity: Structs
So far, we’ve learned how to store and save data in Solidity. But, what if we want to
have different items or people with their associated numbers stored? We need a new
type of function to do that for us. It is most similar to a class in python or other
languages.
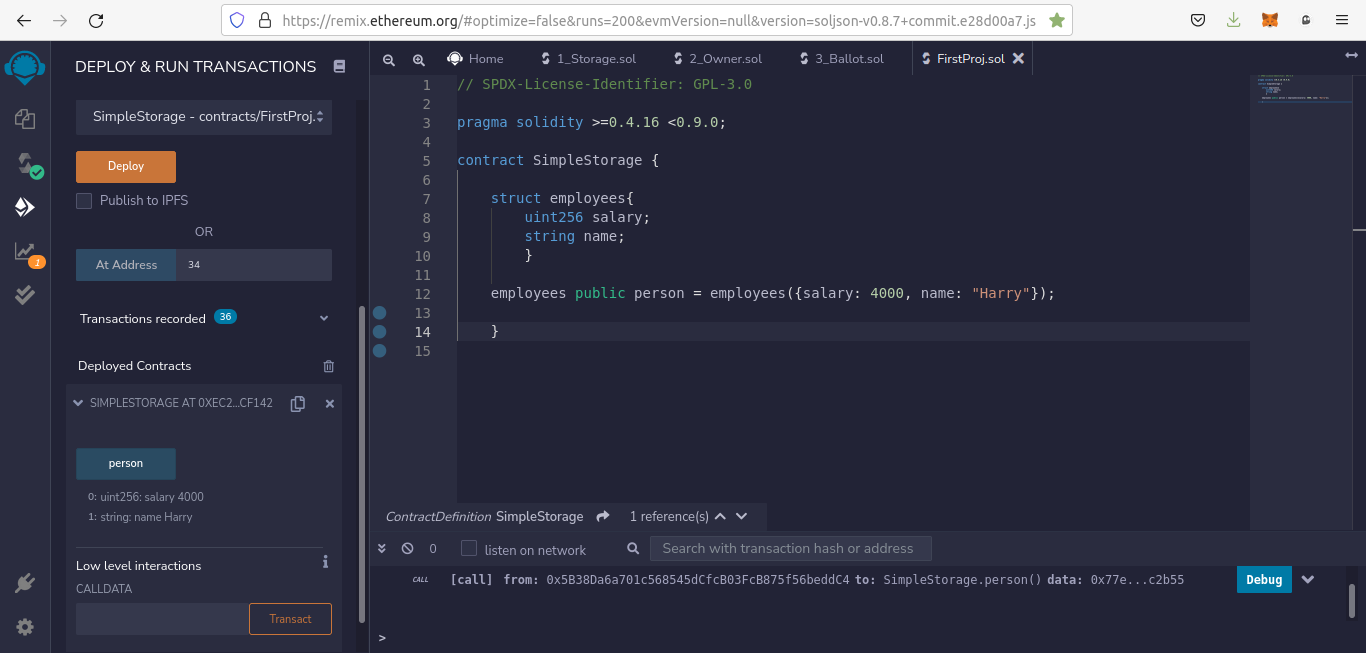
Struct works nearly the same as the class in other object-oriented languages. In
the below example we are going to define a struct named employees and store their
data such as their salary next to their names.
pragma solidity >= 0.4.16 < 0.9.0;
contract SimpleStorage {
struct employees{
uint256 salary;
string name;
}
employees public person = employees({salary: 4000, name: "Harry"});
}

As you can see, once we deploy the contract, a new button appears called the person. And,
if you click on it, you will be able to see the name and the salary of the employee that
you added to the struct. Notice that since we have specified the type of the variable
(person) as public, we can see the button person appears after deploying the contract.
Now, if instead of a person, we want to enter a group of people, we use array.
So instead of writing:
employees public person = employees({salary: 4000, name: "Harry"});
We write:
employees public person;
function addEmployee( uint256 _salary, string memory _name) public {
person.push(employees(_salary,_name));
}
We can add as many employees as we want to the list of employees. The employees public person array is a dynamic array. If we want the array size to be a fixed number. We can write employees public person in which the fixed_number is an integer. After deploying the above code, we will see that 2 buttons appear:

If we enter (2500,”Harry” ) next to the addEmployee button and press it, then next to the person we will write the index of the member of the array which is 0 here. If we click the person button, we will see that the salary of 2500 and the name “Harry” appears under the person button.

Notice that in the addEmployee function, we have declared the name type as memory. There are 2 ways to store data in Solidity, memory, and storage. If we declare it as memory, it will only be stored during the execution time and then it will be removed. But if we declare it as storage, it will be saved permanently.
Now, we have another problem. If for example, we want to fetch the salary of “Harry” or someone else, we cannot do that. This is the place where we use mapping.
Mapping in Solidity
Mapping is a kind of data structure that allows you to map a certain part of your data to be connected to its related features.
Now, if apply this mapping to our code:
mapping (string => uint256) public SalaryOfEmployee;
And also in our addEmployee function we write:
SalaryOfEmployee = _salary;
We will be able to fetch the salary of every person we add to the list of employees.

Congrats! Now we can store data like a database using Solidity if instead of memory we write storage in addEmployee function.
Connecting Remix IDE to Metamask
To get closer to real-world smart contracts, we should run our code using a testnet or mainnet. To do that, we can install Metamask and use the Rinkeby testnet.
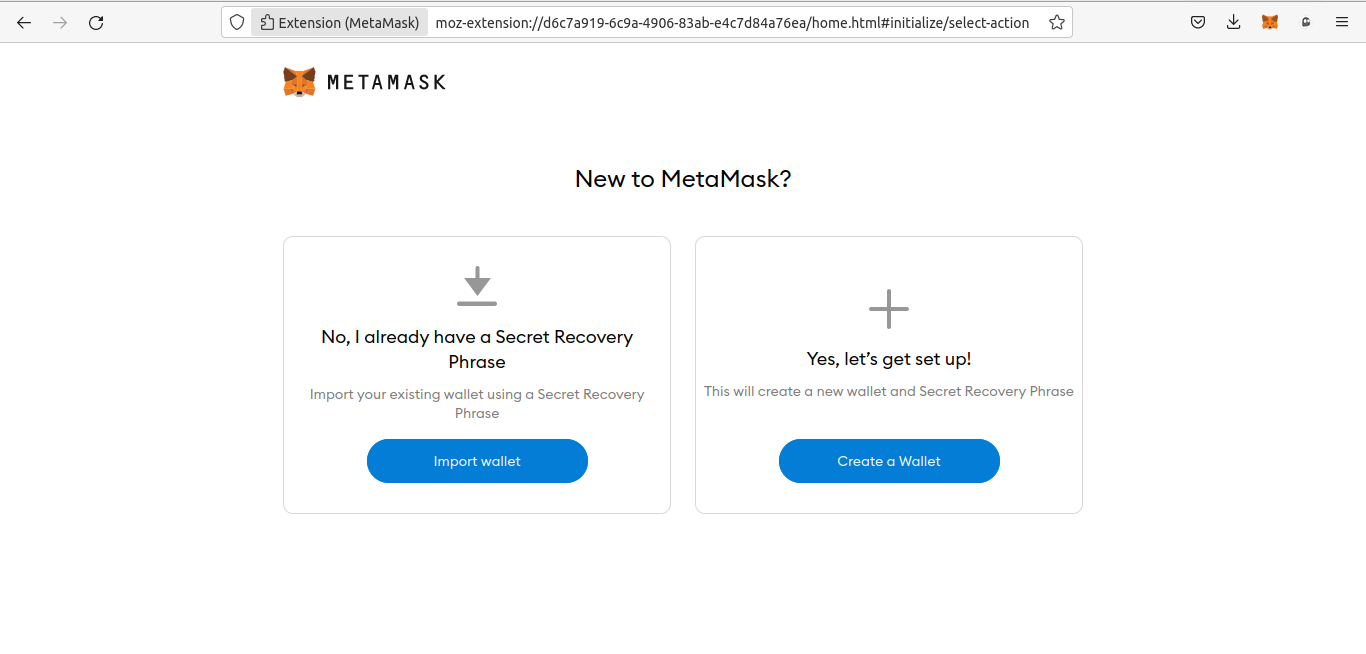
First off, install Metamask extension on your browser using this link and while opening your wallet account, do not forget to write down the mnemonic keywords somewhere on paper.

Once you entered your wallet in the browser extension, go to settings:

And in the advanced settings turn on the show test networks:

Now, you will be able to switch to the Rinkeby test network:

To get some Ethereum for the gas fees of our smart contract, we can go to this link (https://faucet.rinkeby.io/) tweet or facebook the phrase it gives you.

Now you should copy and replace the address of your account with 0x000000… .

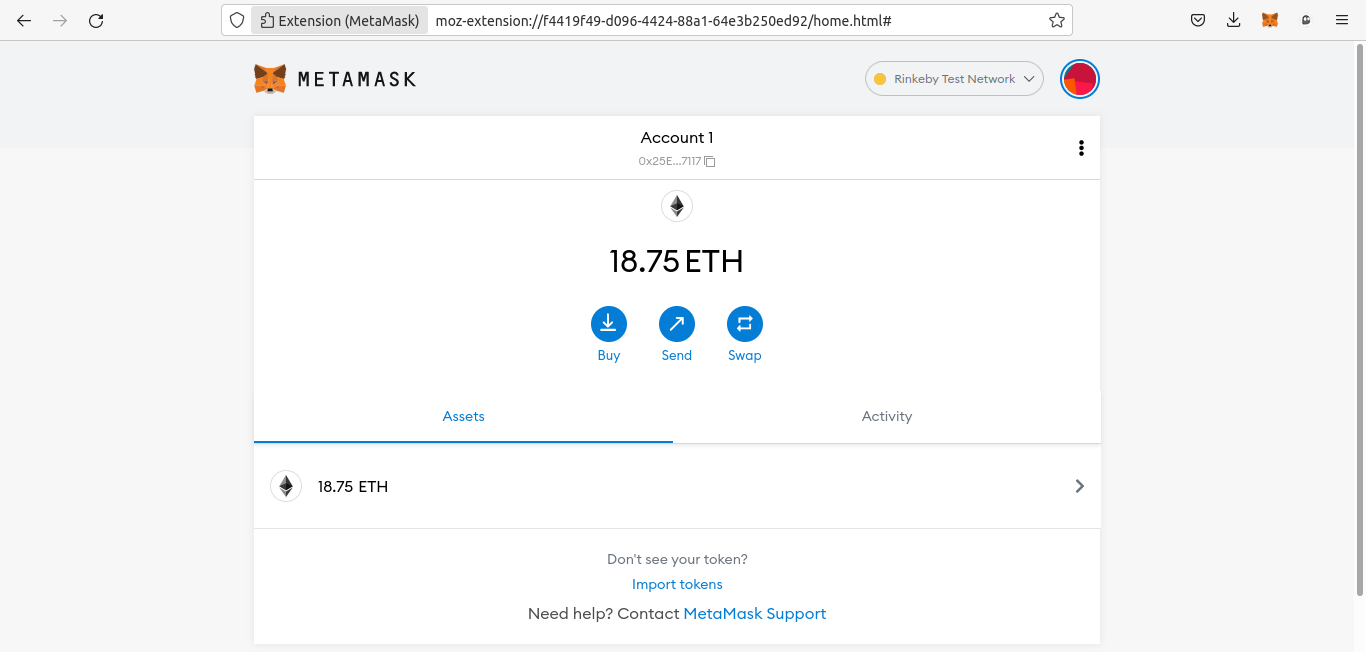
Copy the link of the tweet next to “give me Ether” and press the button. Then, select any of the amount of Ethereum you want and press it. Now if you check your Rinkeby network account, you will be able to see that it has your selected amount of Ethereum.

Now, it is time to connect Remix IDE to your Metamask wallet. To do that, you need to change the environment from JavaScript VM to injected Web3. Once you do that, the Metamask extension will pop up asking whether you want to connect Metamask to connect to remix IDE. Click next, and then connect. Now, you can see that your Metamask is connected to remix IDE. Now if you check the account under the environment in Remix IDE, you will be able to see that instead of 100 ETH you have 18.75 ETH which is related to your Metamask test network balance.

Now, we have successfully connected our IDE to Metamask and can continue our adventure in the world of smart contracts using more real-world tools.
Smart Contracts Using Solidity: Connecting to Testnet
In the previous sections, we learned how to connect remix IDE to the Metamask wallet. Moreover, we learned how to get some free Ethereum for our testnet which was Rinkeby. Now if we deploy our contract, you will see that metamaks pops up and asks you to confirm the transaction and the required gas fee for it. Press Confirm and then you will see that the balance of your account decreases from 18.75 to 18.7489 ETH. Now you can test your smart contract, this time using the Rinkeby test network.

Using Etherscan
Notice that once we deploy our contract, we get a link of Etherscan in the console section of the IDE to be able to track our transaction on the Ethereum blockchain.

It is also worth mentioning that when we deploy the contract and store data, for example ( here we have addEmployee) again we will face the Metamask pop-up that asks us whether we want to confirm the transaction or not. Notice that every storage is considered as a transaction on the Ethereum blockchain and is trackable using the Etherscan link given on the console.

However, the retrieve functions when applied will not cost anything, because they are not considered a transaction. In the photo below you can see that we have retrieved the specifications of the first member of the list and also Sarah’s salary, it hasn’t ended up with the Metamask pop-up asking for any kind of confirmation.

Up to now, we have learned how to write and deploy a smart contract. But what if we want to deploy a contract using another contract?
How to deploy a contract from another contract?
At first, we make a new project in our current folder (=>contracts => artifacts) and call it storageBank.sol. Then, write the following code in the new file you’ve just created.
// SPDX-License-Identifier: MIT
pragma solidity >= 0.4.16 < 0.9.0;
import "./FirstProj.sol";
contract StorageBank {
SimpleStorage public StorageArray;
function StorageContract() public{
SimpleStorage storageContract = new SimpleStorage();
StorageArray.push(storageContract);
}
}
// SPDX-License-Identifier: MIT is the necessary part of every Solidity script file that shows the license of the Solidity and helps you avoid the license warning. The first thing that you will notice when reading this script is that we have imported our last script file and that is the contract that we want to deploy in this new contract.
So, we define a new contract called StorageBank and inside of it, we declare an array called StorageArray with SimpleStorage identifier and public declaration. Then, we define a public function called StorageContract using which we call the recent contract that we had imported in this one and put it in the StorageArray.
Once we deploy this contract, we will again see the Metamask pop-up and after a few seconds, we can open the contract and press StorageContract. The same popup scenario repeats for this one as well and then shortly after, when the transaction has been confirmed by Metamask, we will be able to retrieve and run FirstProj.sol contract. To do that, we enter 0 in the box next to StorageArray and press the key. Once you do that, you will see the address of the contract you’ve been willing to open from this one appears below the button.

Now, without using any of the functions inside FirstProj.sol contract, the above code is useless. So, now using the script below in the following instead of the previous code, we will be able to use our desired functions.
// SPDX-License-Identifier: MIT
pragma solidity >=0.4.16
function GetNumber(uint256 _storeIndex) public view returns(uint256){
SimpleStorage simplestorage = SimpleStorage(address(StorageArray));
simplestorage.retrieve();
Adding the above code to the rest of the contract will return the number that we have saved. That’s it! now we can have interaction between different contracts or in other words we can inherit from a contract and use it in another one.
https://blog.arashtad.com/blockchain/ethereum/smart-contracts-using-solidity/
Comments
Post a Comment