How to Design Textures in Three js?

Adding textures to the scene differentiates a novice design from a simple one. Textures create a
more realistic effect on the objects, especially when you want to simulate real-world objects that
have certain surfaces in addition to the bumps and dumps. Some textures create the colors and
sketches; others cover the 3d ups and downs on the object's surface. So, in general, to have a
real-world texture, you need a normal map, usually blue, a displacement map, and a photo of the
surface.
In this tutorial, we will create a scene in Three.js with an object and find the texture we are
looking for from the web. Afterward, we will project the texture we found on the object's surface,
which is, in this case, a sphere. The next thing we will do is to add the normal map and the
displacement map. Most of the time, when you are looking for a texture on a particular website
and downloading it, you will get the Zip file containing all the maps necessary to create the kind of
texture you like. But, if you find a particular photo somewhere and want a normal map and the
displacement map if you don't see any, don't worry. Because in this tutorial, we will teach you how
you can generate these maps on your own.
Getting started with the basics:
We are going to get started with the simple elements of a Three js scene including
the camera, the renderer, the scene, the object and the light source (if necessary).
Before we do that, we’d rather use the Vite plugin to be able to easily create all the
folders and file that you need to run the Three.js code. First off, create a folder in the
directory of your projects by using the following commands:
Coppied to clipboard.
mkdir Textures
cd Textures
Then, inside of the your project folder, create the necessary files and folders by
simply running the Vite plugin command:
Coppied to clipboard.
npm create vite@latest
Then enter the name of the project. You can write the name of your project as the
name. And also the package (the name is arbitrary and you can choose anything
that you want). Then select vanilla as the framework and variant. After that, enter the
following commands in the terminal:
Coppied to clipboard.
cd Textures
npm install
Afterwards, you can enter the javascript code that you want to write in the main.js
file. So, we will enter the base or template code for running every project with an
animating object, such as an sphere. Also do not forget to install Three.js package
library every time create a project:
Coppied to clipboard.
npm install three
Now, enter the following script in the main.js file:
import * as THREE from 'three';
import { Mesh } from 'three';
const scene = new THREE.Scene();
const camera = new THREE.PerspectiveCamera(75, innerWidth / innerHeight , 0.1, 1000);
const renderer = new THREE.WebGLRenderer({
antialias : true
});
renderer.setSize(innerWidth, innerHeight);
document.body.appendChild(renderer.domElement);
//creating a sphere
const geometry = new THREE.SphereGeometry(5, 50, 50);
const material = new THREE.MeshBasicMaterial({
color:0x3268F8;
})
const sphere = new THREE.Mesh(geometry,material);
scene.add(sphere);
camera.position.z = 15;
function animate(){
requestAnimationFrame(animate);
renderer.render(scene,camera);
sphere.rotation.y += 0.003;
}
animate();
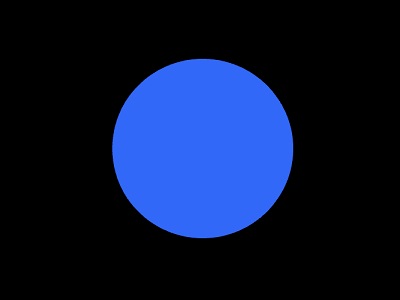
The above code can be used as a boilerplate for later projects. The output of this
code will be blue sphere like the below photo. But to be able to show that, you
should write the following command in the terminal:
Coppied to clipboard.
npm run dev
Finding the source of the texture file:
To find the texture file of your choice, you can google the name of it. But if you want
some high-quality textures with all the necessary maps, we recommend you
polyhaven.com. There are many textures in there that you find appropriate.
However, if you do not see the kind of texture you are looking for, there are many
other sources that you can get help from. In the end, if you didn't find anything and
you had a photo that you wanted to get the texture maps of it, you can google
normal map generator, and the first result, which is most probably
https://cpetry.github.io/NormalMap-Online/, will do the job for you. The only thing you
need to do is to upload your image and then download the resulting normal map and
displacement map photos. Once you get these images, you are ready to write our
script.
Three.js texture scripts:
Now to write our Three.js texture code, we will use the below texture.

And here’s our final script for adding textures:
import * as THREE from 'three';
import { Mesh } from 'three';
const scene = new THREE.Scene();
const camera = new THREE.PerspectiveCamera(75, innerWidth / innerHeight , 0.1, 1000);
const renderer = new THREE.WebGLRenderer({
antialias : true
});
renderer.setSize(innerWidth, innerHeight);
document.body.appendChild(renderer.domElement);
//creating a sphere
const geometry = new THREE.SphereGeometry(5, 50, 50);
const material = new THREE.MeshStandardMaterial({
map : new THREE.TextureLoader().load(
'./img/aerial_rocks_02_diff_4k.jpg')
});
material.displacementMap = new THREE.TextureLoader().load './img/aerial_rocks_02_disp_1k.jpg');
material.normalMap = new THREE.TextureLoader().load('./img/aerial_rocks_02_nor_dx_1k.jpg');
const sphere = new THREE.Mesh(geometry, material);
scene.add(sphere);
camera.position.z = 15;
const width = 20;
const height = 20;
const intensity = 2.5;
const rectLight = new THREE.RectAreaLight(0xffffff, intensity, width, height);
rectLight.position.set( 5, 5, 5);
rectLight.lookAt(0.5, 0.5, 0.5);
scene.add(rectLight);
function animate(){
requestAnimationFrame(animate);
renderer.render(scene,camera);
sphere.rotation.y += 0.003;
}
Animate();
The above script will give the following result:

Conclusion
In this tutorial, we learned how to add different kinds of textures using the main
textures, the normal map, and the displacement map, in addition to that, we
learned about the process that we need to take to get the normal map and the
displacement map from a photo of a texture.
In general, textures in Three.js is not different than the ones in other
designing platforms or software applications. In Blender, we take the same steps
to create a texture of an object. The only difference is in the format of the scripts.
In Three.js we use JavaScript and in Blender, we use Python.
Download this Article in PDF format

Arashtad Custom Services
In Arashtad, we have gathered a professional team of developers who are working in fields such as 3D websites, 3D games, metaverses, and other types of WebGL and 3D applications as well as blockchain developemnet.
Visit Our Services
Arashtad Serivces
Tell us about your ideas to get a Free Counseling.
Get a Quote
Design and Modeling
Web Development
https://blog.arashtad.com/blog/how-to-design-textures-in-three-js/


Comments
Post a Comment